
Time: about 6 minutes · Plan: Free, every plan · You'll need: the Studio with a song in Today's Plan, and someone at the back of the room (or a walk there yourself)
Open the Presentation / Theme dock and start from a built-in theme. Make the words bigger, give them an outline, a shadow or a stripe behind them, and move them where heads don't cover them. Save it as your own theme and star it, and every song without its own look wears it.
Step 1: Put a song on the screen
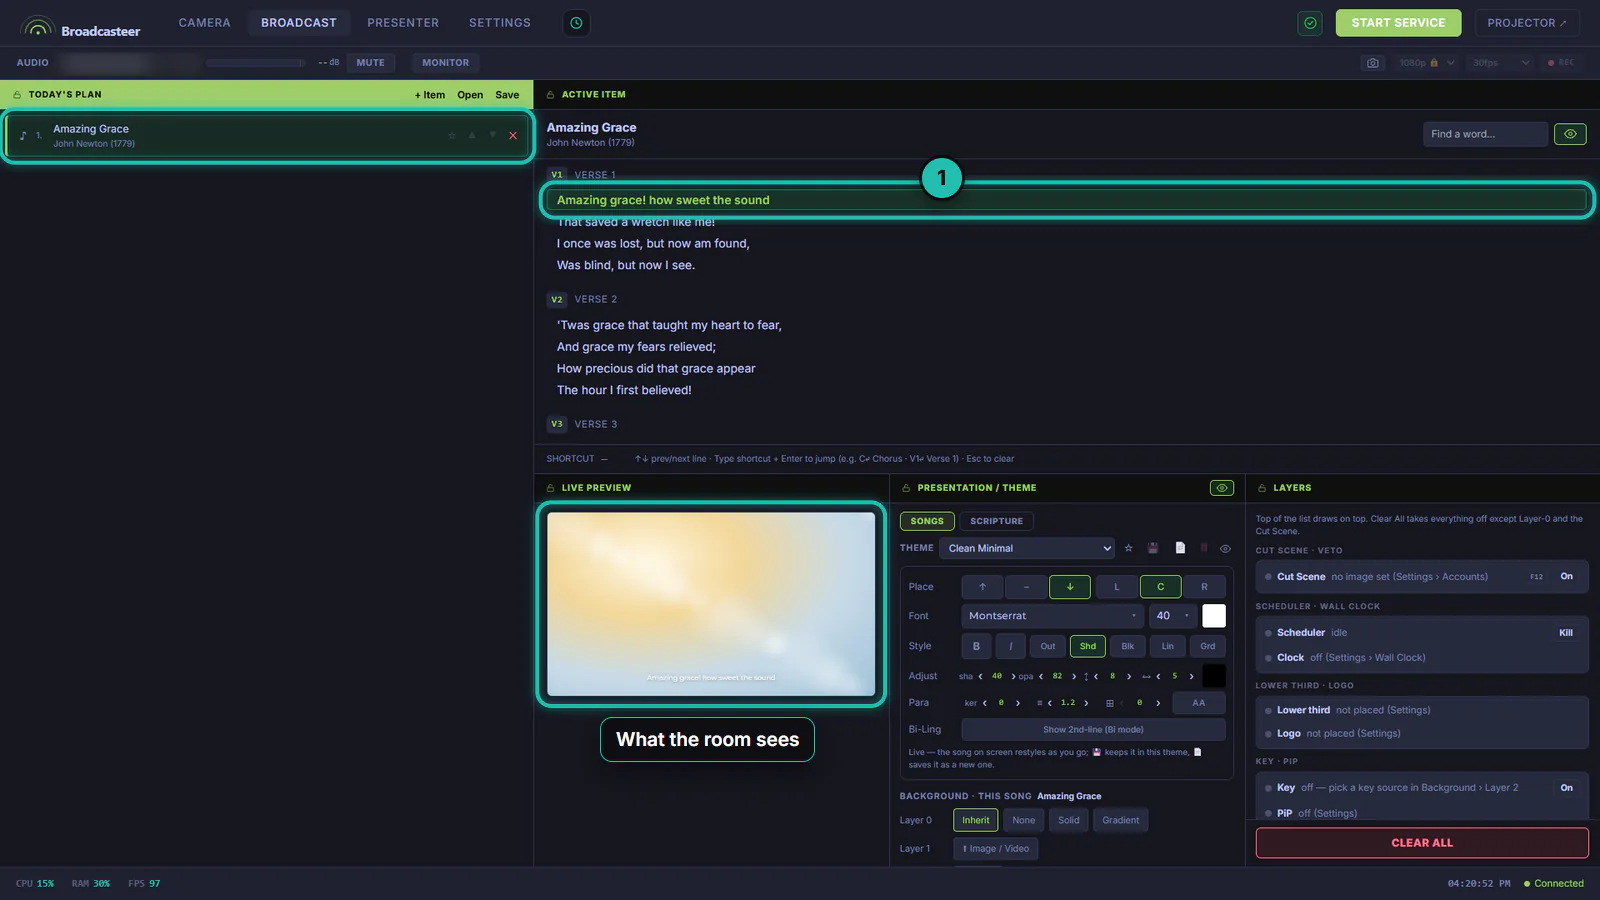
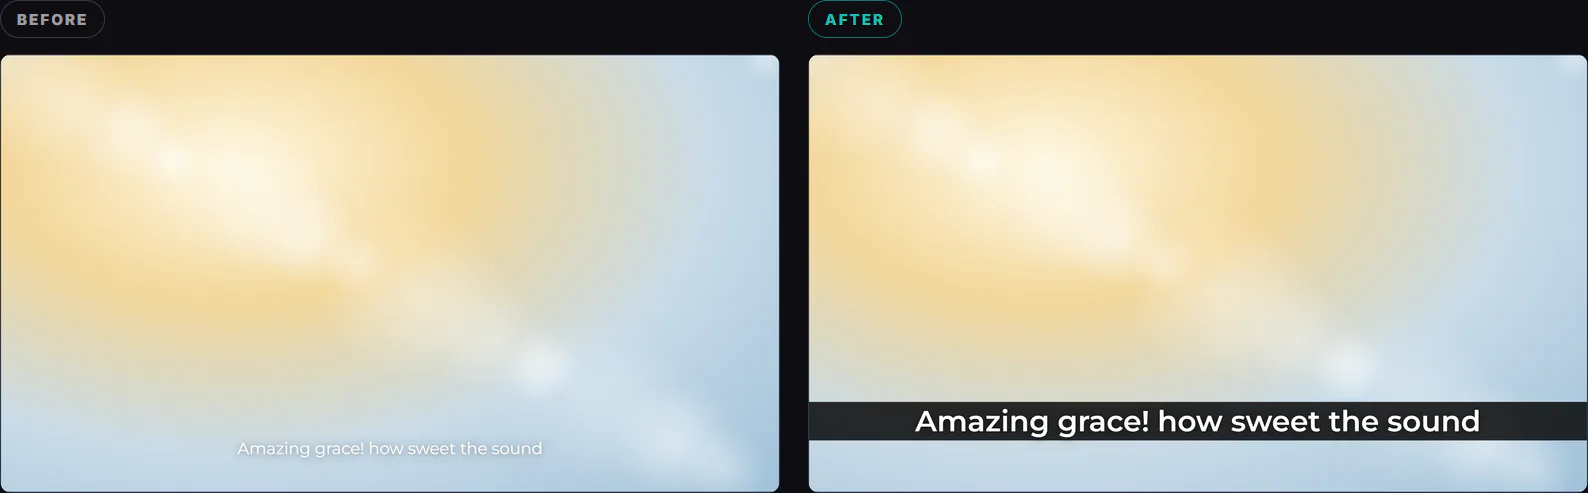
Click a song in TODAY'S PLAN, then click a line in ACTIVE ITEM. LIVE PREVIEW shows what the room sees. Here it's thin white words on a bright picture, the look that disappears from the back row.
Step 2: Open the Presentation / Theme dock
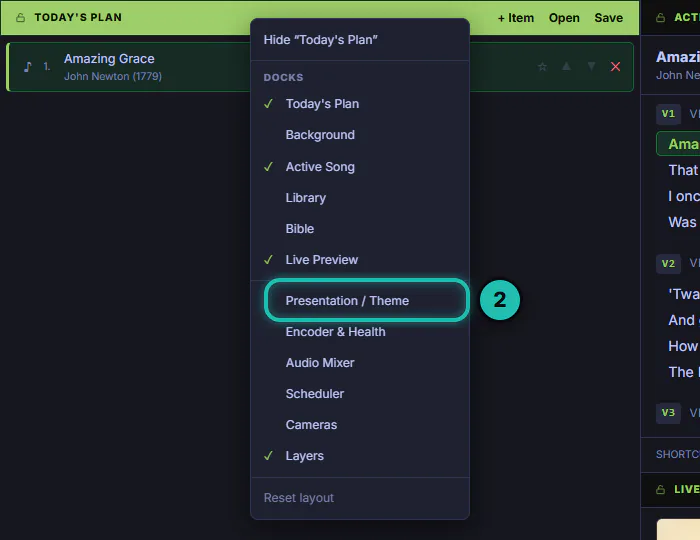
It's hidden until you ask for it. Right-click any dock's title bar and, under DOCKS, choose Presentation / Theme.
Step 3: Start from a theme
Keep SONGS picked. The THEME list has seven built-in looks: Classic, Bold Block, Clean Minimal, Top Banner, Center Stage, Bilingual Duet and Scripture. Everything you change in this dock goes to the screen straight away, so do it before the service or with the projector off.
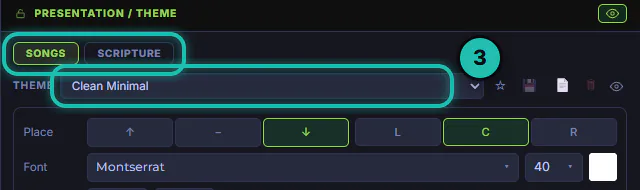
If you see the list but none of the controls under it, press the eye button at the end of the THEME bar.
Step 4: Make the words bigger
On the Font row, the number beside the typeface is the size. Sizes run from 18 to 96, and the line in LIVE PREVIEW grows as you pick. The square at the end is the colour.
Step 5: Give the words something to stand on
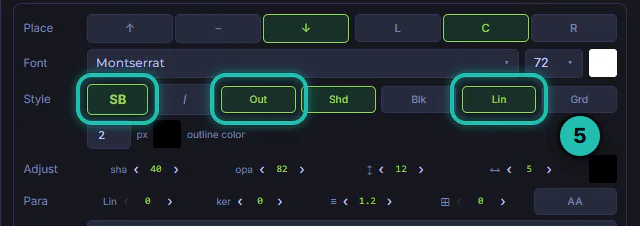
The Style row does the most for a bright or busy picture:
- B makes the words heavier. Each press steps the weight: SB, B, B+, then back to regular.
- Out draws an outline. Its thickness in px and its colour appear under the row.
- Shd adds a shadow; sha under Adjust sets how strong.
- Blk puts one solid bar behind the words, Lin a stripe behind each line, Grd a soft fade at the top and bottom of the screen. opa under Adjust sets how strong the bar, stripe or fade is, and the square at the end of Adjust tints it.
Step 6: Put them where heads don't cover them
On the Place row, ↑ − ↓ puts the words at the top, middle or bottom, and L C R lines them up. Under Adjust, ↕ is the distance from the top or bottom edge (2 to 40 percent) and ↔ is the side margin. Under Para, ≡ spaces the lines apart, ker spaces the letters, ⊞ keeps a safe area on all four sides, and AA shows the words in capitals without retyping the song.
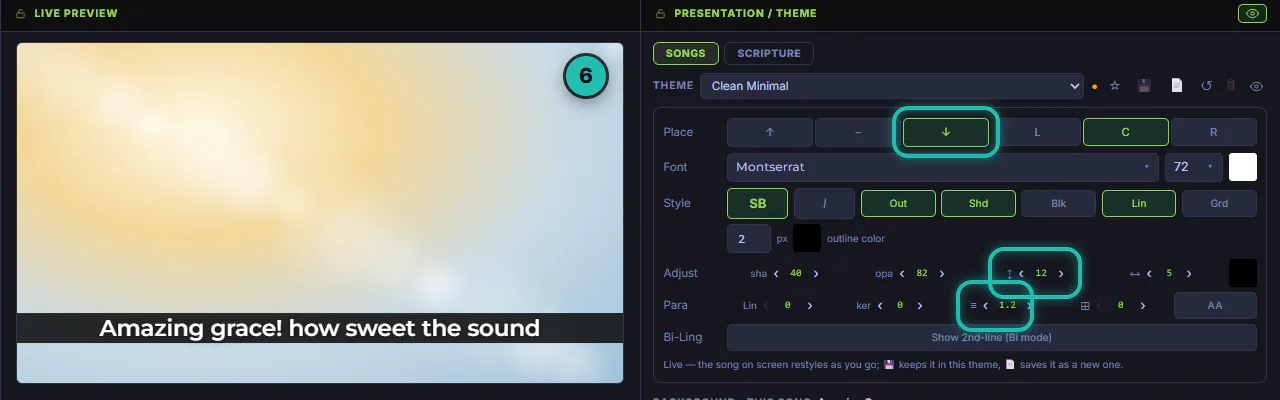
I raised the line from 8 to 12 here, so it clears the heads in the front rows.
Step 7: Save it and make it the default
Press 📄 (Save As), type a name and press Save. Then press ☆ beside the list. It turns into a gold ★, and every song that doesn't have its own theme wears this one. 💾 saves later changes into it, and a small dot beside the list means there are changes you haven't saved.

If 💾 stays grey, you're on a built-in theme. Those can't be changed, so use 📄 to keep a copy under your own name.
Step 8: Give Bible verses their look too
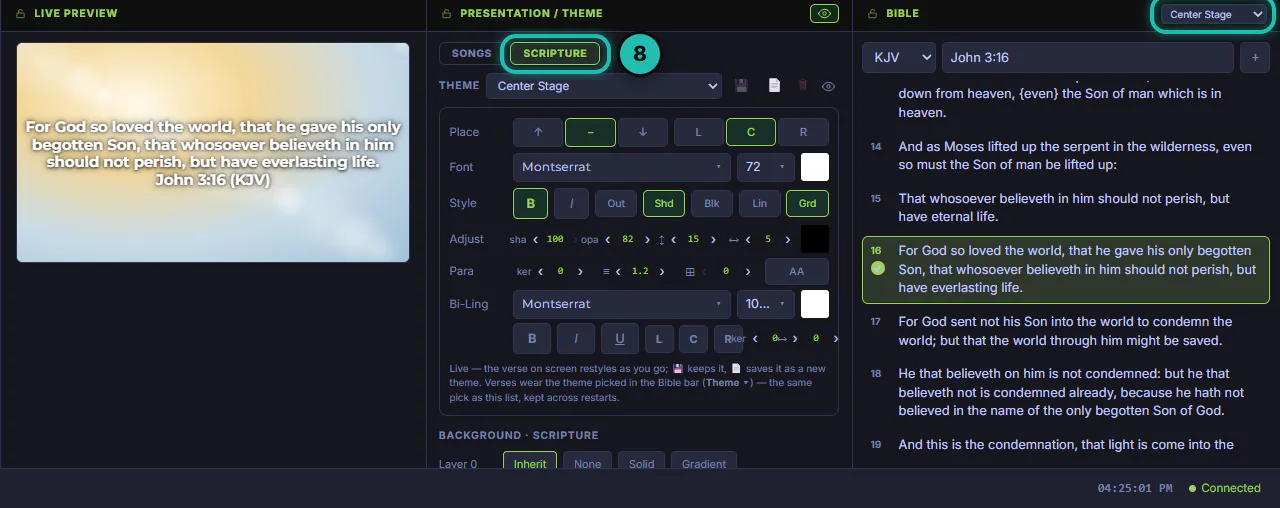
Click SCRIPTURE at the top of the dock: the same controls, for verses only. Verses wear the theme picked in the BIBLE dock's theme list, at the top right of that dock, so pick it there as well. Then walk to the back row and look, with the projector on.
If it doesn't work
- The next song went back to the old look. That song has its own theme in Edit Song, and a song's own theme wins over the starred default. Set it to Default (follow Studio ★) there.
- 💾 stays grey. Built-in themes can't be changed. Use 📄 to save a copy under your own name.
- B does nothing. That typeface comes in one weight only. Pick another font.
- There's no Presentation / Theme dock. It's hidden by default. Right-click any dock's title bar and choose it under DOCKS.
- Verses still look different from the songs. They wear the Scripture look picked in the Bible dock's theme list, not the song theme.