
Time: about 15 minutes for one song and one verse · Plan: Free, every plan · You'll need: Broadcasteer on a Windows laptop, a projector or TV set to Extend, song words you're allowed to project
In the Studio's Broadcast tab, add the song to the Library once, put it in Today's Plan and click a line: that line goes on the screen. For scripture, type a reference such as John 3:16 in the Bible dock, select the verse, right-click and choose Go Live. All of it works on the free plan, and the projector shows exactly what the Live Preview shows.
Step 1: Open the Broadcast tab
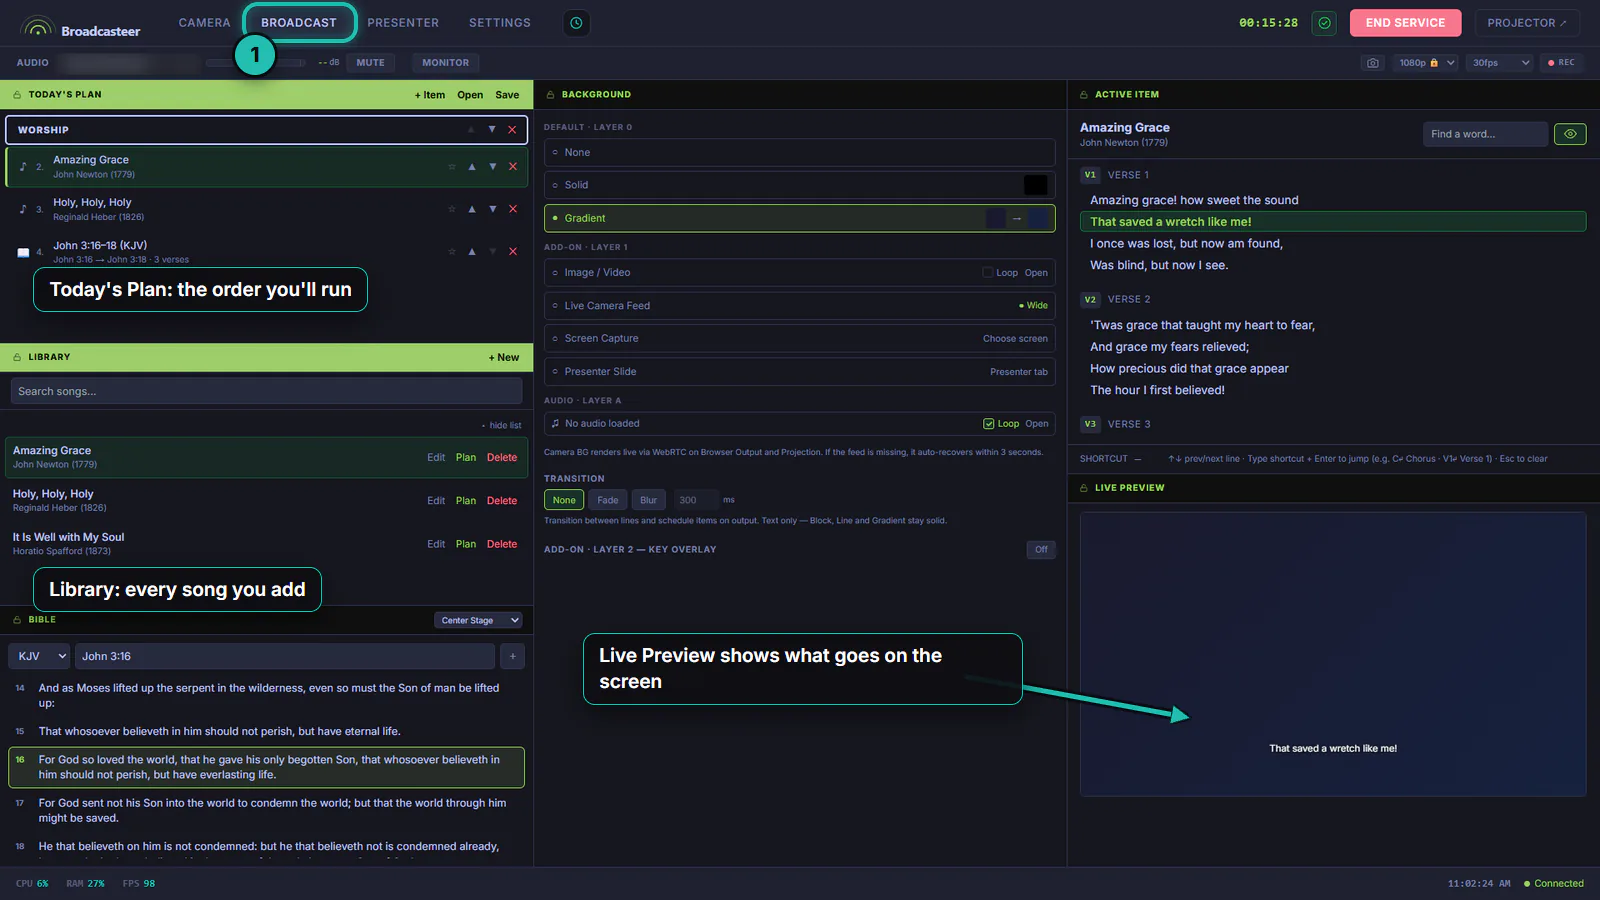
Everything for words on a screen lives in the Broadcast tab. On the left: Today's Plan (the order you'll run), the Library (every song you've added) and the Bible. On the right: the Active Item you're working through and the Live Preview, which is what goes on the screen.
Step 2: Put the output on the projector
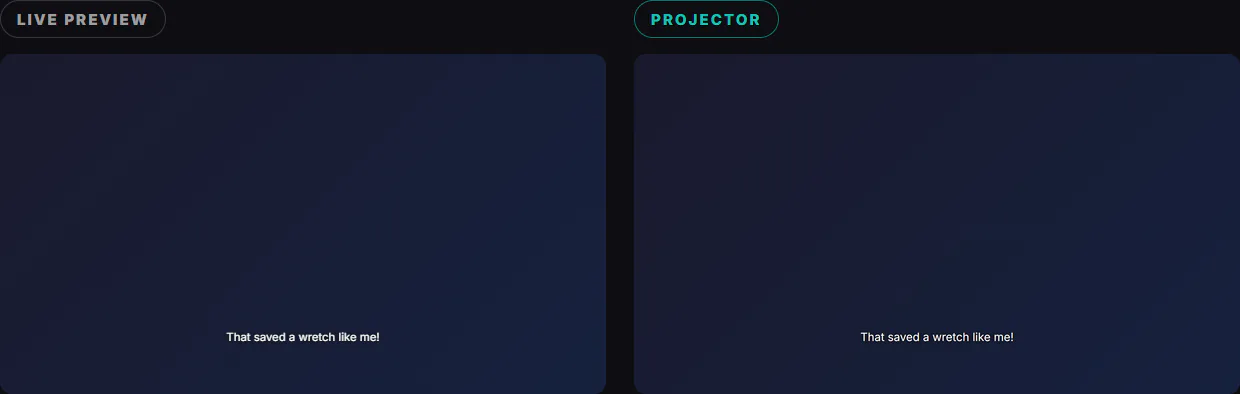
In Windows display settings, set the projector to Extend, not Duplicate. If the Projection Module is running (every plan, from the Modules tab of your dashboard), that's it: the output appears on the projector by itself, full screen, and comes back whenever the projector is switched on.
No module? Press PROJECTOR ↗ at the top right of the Studio. The output opens in its own window: drag it onto the projector screen and make it full screen.

Step 3: Add a song to the Library
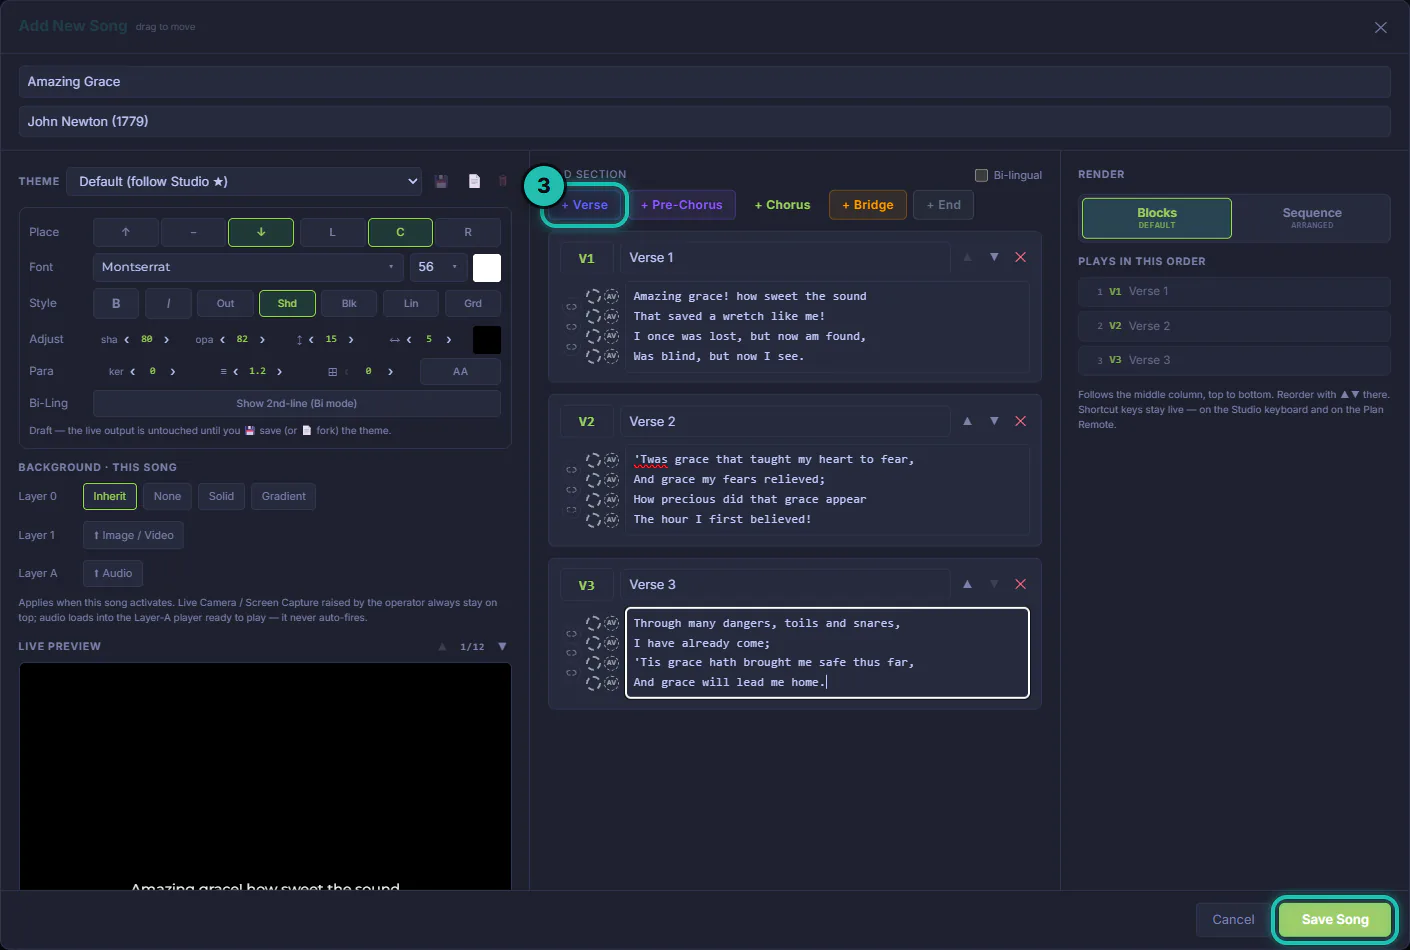
Press + New on the Library bar. Type the Song title and, if you like, the artist. Press + Verse and paste the verse, one line per row; add + Chorus or + Bridge the same way. Then Save Song.
Only project words you have the right to: your church's licence, or a public-domain hymn like this one.
Step 4: Put it in Today's Plan
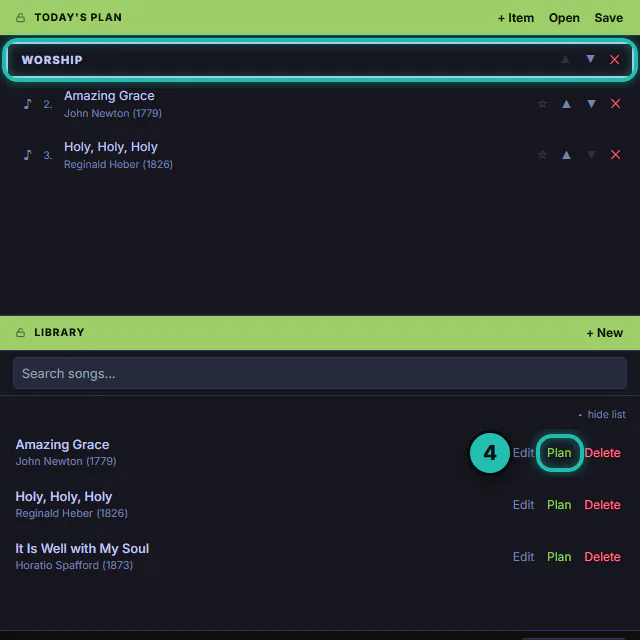
Press Plan on the song's row in the Library and it joins Today's Plan. For a running order with sections, press + Item › Section Header first, type WORSHIP and press Add.
Step 5: Click a line to put it on the screen
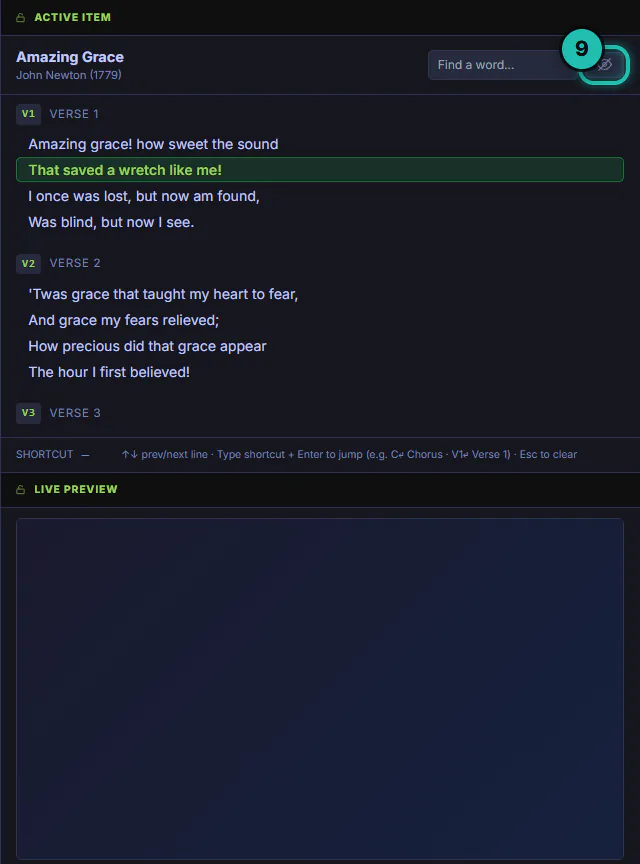
Click the song in Today's Plan and it opens as the Active Item, every line listed. Click a line and it's on the screen. The up and down arrow keys move to the previous or next line, and typing a section's name (V2, then Enter) jumps straight to it.
Step 6: Find a verse
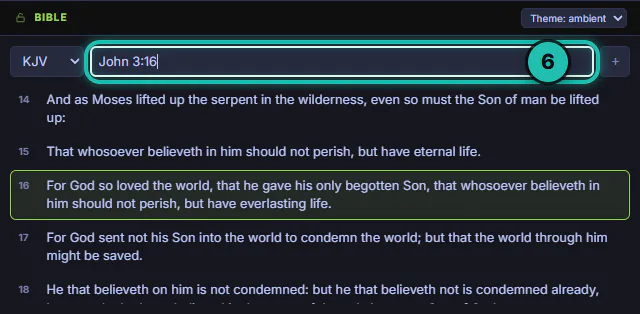
In the Bible dock, type a reference like John 3:16 into the search box. The chapter opens with that verse highlighted. Typing words instead of a reference searches the text.
Step 7: Right-click and Go Live
Click the verse to select it. Nothing goes on the screen yet. Right-click it and choose Go Live (the menu names the verse), and it's up.
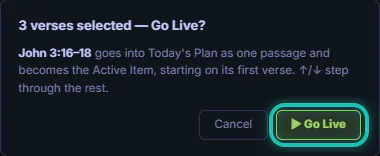
For a run of verses, Shift+click the last one, right-click and choose Go Live. The Studio asks first, then adds the whole passage to Today's Plan and starts on its first verse; the arrow keys step through the rest.
Step 8: Give verses their own look
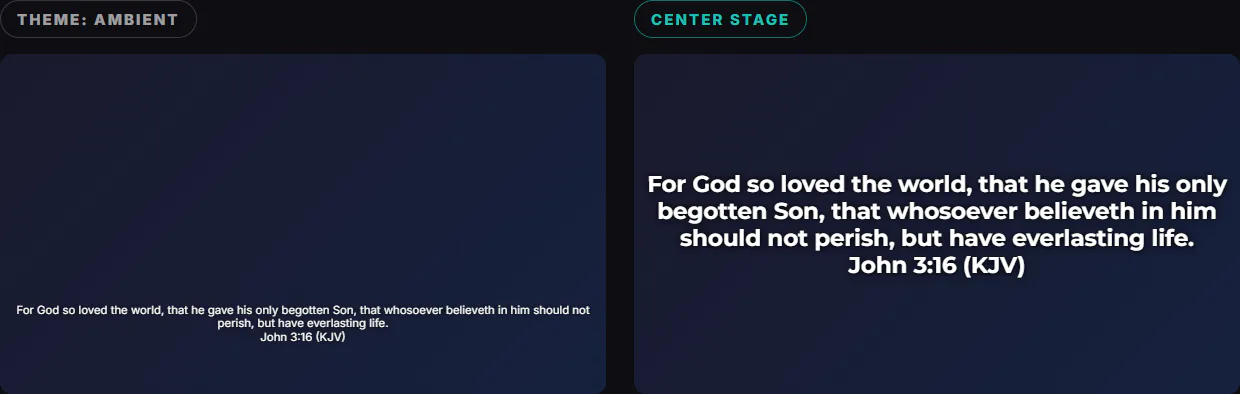
The select on the Bible bar (it starts on Theme: ambient) sets how verses look on the screen. Pick Center Stage and the verse fills the middle in large type. It applies to scripture only; your songs keep their own look.
Step 9: Take the words off without losing your place
The eye button at the top of the Active Item hides the words from the screen. Your line stays selected, so one more click on the eye brings it straight back. The background stays up while the words are hidden.
If it doesn't work
- The projector shows your desktop instead of the words. Windows is set to Duplicate. Switch the projector to Extend. With the Projection Module the output moves there by itself; without it, drag the output window onto it.
- You clicked a verse and nothing changed on the screen. That's on purpose: a click only selects. Right-click the verse and choose Go Live.
- Your translation isn't in the list. The King James Version and the Chinese Union Version come with Broadcasteer. Import your church's own licensed XML Bible with the plus button next to the search box.
- The words went off and you can't get them back. The eye button in the Active Item is switched off. Click it again.
- A dock has disappeared. Right-click any dock bar, open Docks and tick it again, or choose Reset layout.